It’s HERE! Hunting and Angling Season is FINALLY Upon Us!
September 8, 20202021 Extravaganza Press Release
May 28, 2021
November 2020 Newsletter
Dear MWF Supporters,
I hope this season of falling leaves and opening weekends finds you well. Every year when the temperature finally starts to drop and the air becomes a bit crisper, I find myself feeling a tingle of excitement, whether it's from the promise of the upcoming holidays or the anticipation of time spent in golden-hued woods or camouflaged blinds, there is a lot to look forward to this time of year. Thankfully, virus or no virus, we can still look forward to those very same things THIS year.
One thing these difficult last six months has taught me is to appreciate and be extra thankful for our families and our access to outdoors and sportsman's pursuits now more than ever. We hope you get outside this week and take advantage of both. Here are some news and resources from across the state we hope you will find informative and helpful.
Ashlee Ellis Smith, CEO
Mississippi Wildlife Federation
An Update: Ten years after the Deepwater Horizon oil spill, Mississippi continues to push billions in settlement dollars towards coastal restoration.
https://mississippitoday.org/2020/11/10/several-years-into-bp-settlement-spending-the-bulk-of-mississippis-restoration-work-remains-undone/

How to Site a Rifle:

We hope our bow hunting friends are enjoying their time in the woods, but for those of you who are waiting for gun season and especially those just starting out, here are some tips from our friends at Team Bushnell we think are excellent.
By: Team Bushnell
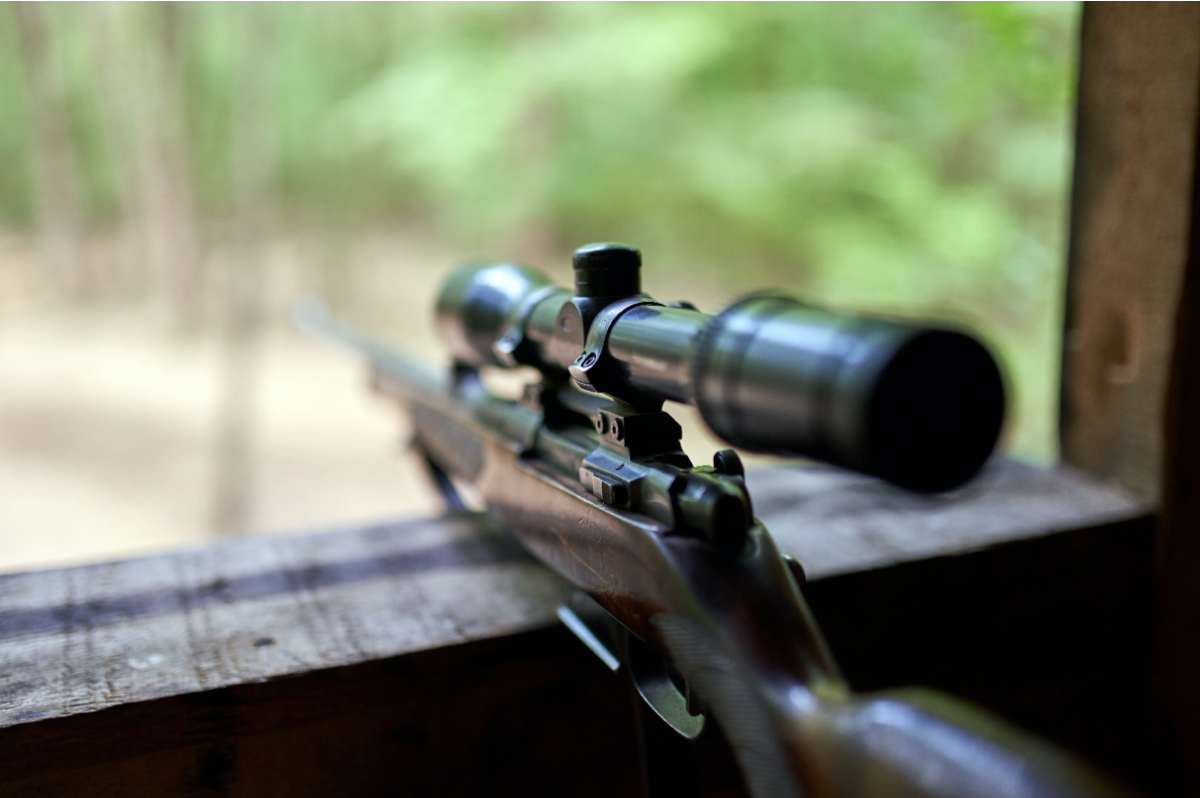
It doesn’t matter what we’re hunting – our equipment must be in top working order. Ensuring that everything is set to target whitetail deer, black bear, or any other big game, includes making sure that our scope is sighted in accurately.
A scope that is not sighted in correctly can result in missing your target or, even worse, an unethical kill. Because this is such a high priority for us as hunters, we want to provide you with an easy-to-follow guide to get your scope set up properly and ready to go.
Getting a Rifle Scope Set Up
Many hunters use rifle scopes. They provide hunters with an excellent vantage point to ensure a good kill, so it benefits you to make sure it’s being used correctly.
Before we start sighting in our scope, we’re going to make sure that the scope is mounted correctly one final time. Rings need to be tight and torqued to recommended specifications. Eye relief should also be set correctly as to make sure you aren’t impacted by the optic under recoil – Safety first!
Boresighting First, Always
Stop and slow down. Take the time to boresight a new scope first before ever shooting a rifle. It will save us all time as we get down to business. When it comes to how to use a bore sight or bore sighting a rifle as it’s known in shooting circles, we start by clearing the rifle. The gun must be unloaded, and the barrel must be unobstructed as we get started.
Once we’re certain the rifle is clear and unloaded, the bolt or magazine needs to be removed. Then we’re going to mount our rifle on a secure resting point with the barrel aimed downrange and proceed with cleaning the rifle. Once that is done, we can move on to the next step.
Resting and Centering the Bore and Scope
To bore sight a rifle, you’ll want to place it on a shooting rest. Shooting rests are easy to come by – most stores with an outdoors, shooting, or hunting department carries them. They typically aren’t very expensive either. After we’ve got our rifle situated on a rest, we’re going to stand behind the rifle, looking through the bore, or through the rifle barrel. The goal is to center the target in the bore making slight adjustments by moving the rifle carefully. The next step is to adjust the scope to center without moving the rifle. We want to get the reticle centered on the same target we’re looking at down the bore.
Precision and Boresighting
The thing about a boresight is that it doesn’t have to be entirely exact. Our goal is to make sure it’s accurate enough to hit a paper target at shorter distance. If we test our rifle at 25 yards and hit the paper, we’re doing pretty good. If you prefer not to bore sight manually, there is also the option of using a laser boresight. It fits into your rifle’s chamber and does the same thing. Bushnell’s 74333 Boresighter is an excellent example of one that works well for a variety of rifles. Admittedly, it does make life easier to make your gun precise, but it’s not necessary. After it looks like the boresight is set and the reticle or red dot are lined up with the target, we can tighten it all up. Take care not to move the scope or sight to keep it on target.
A Guide on How to Sight in a Rifle Scope:
Focusing the Rectile
Once tightened, we need to focus the reticle, or the crosshair, on the scope. Our eye must focus sharply on the crosshairs when we look through the scope. To focus the reticle, we need a solid background – the sky works well for this. We start by pointing our scope at the sky, looking away at a cloud or tree in the distance, and then bringing our eyes back to the scope. When we bring our eyes back to the scope, we need to verify that it is immediately sharp and in focus. We don’t want to wait for our eyes to adjust – it needs to be faster than that. If the reticle looks a little blurry, adjust the diopter adjustment. The diopter is located nearest to us. From there, it’s a matter of adjusting until we see the reticle immediately clear upon looking through the sight. We also want to verify that the reticle is parallel and perfectly aligned to elevation and windage. In other words, it needs to look like a perfect cross when we look through the scope. Getting reticle right in closer shots is critical for shooting at longer distances later.

Time to Start Shooting
After the scope is tightened and the reticle is adjusted and focused, it’s time to start shooting.
Here’s a pro tip for you – always use the same ammo you plan to hunt with when you test your rifle. It will give you a good idea of how it will react when you’re out there hunting.
Since bore sighting is only intended to get us on paper at 25 yards, that’s where we’ll start shooting.
To make this easy, use sand bags and/or a shooting rest to hold the rifle steady. Aim at the center of the target and fire a shot. The rifle will recoil, the shot will land. Return the rifle to the center of the target with the action open. Once it’s back on center and steady, hold it as steady as possible while looking through the scope and adjusting the crosshair to the point of impact. Fire another shot and repeat the process if necessary.
Once the shot is on center, we then go out to a farther range.
Adjusting the Distance
When it comes to understanding how to sight in a scope at varying distances, the adjustments are very small and moves by one-quarter inch MOA, or minute of angle, for every hundred yards out.
On average, every quarter inch moves our shot by an inch for every hundred-yard increase.
When we can consistently shoot grouped shots close to the bullseye at each distance, then we can fine tune for targets that will be further away. Remember not to shoot too fast, as some rifles tend to “walk” shots when the barrel starts to heat up. In other words, your rifle will not hit the exact spot you aim if you shoot too fast, so give your barrel some time to cool between shots.
Remember, practice makes progress, and eventually, precision follows.
https://www.bushnell.com/through-the-lens/bu-blog-a-guide-on-how-to-sight-in-a-rifle-scope.html,
News and Resources:
MDMR to waive permit fees for rebuilding, repairing storm damaged structures.
https://dmr.ms.gov/mdmr-to-waive-permit-fees-for-rebuilding-repairing-storm-damaged-structures/
Lawrence County Archer Drops a Dandy Buck
https://www.ms-sportsman.com/hunting/deer-hunting/lawrence-county-archer-drops-a-dandy-buck/?utm_source=Sportsman&utm_campaign=483a68365d-RSS-MSS-Newsletters-Post-with-Pics&utm_medium=email&utm_term=0_99a223f26a-483a68365d-33295752&goal=0_99a223f26a-483a68365d-33295752&mc_cid=483a68365d&mc_eid=28334631c9
Burn ban still in effect in Harrison County
https://www.wxxv25.com/2020/11/04/fire-chief-burn-ban-still-in-effect-in-harrison-county/

CWD Precautions for Handling Deer
https://www.ms-sportsman.com/hunting/deer-hunting/cwd-precautions-for-handling-deer-2/?utm_source=Sportsman&utm_campaign=063f170623-RSS-MSS-Newsletters-Post-with-
Governor Reeves announces his appointment for MDMR Executive Director
https://www.ms-sportsman.com/news/governor-reeves-announces-his-appointment-for-mdmr-executive-director/?utm_source=Sportsman&utm_campaign=063f170623-RSS-MSS-Newsletters-Post-with-Pics&utm_medium=email&utm_term=0_99a223f26a-063f170623-33295752&goal=0_99a223f26a-063f170623-33295752&mc_cid=063f170623&mc_eid=28334631c9
Do It Yourself Duck Blind Dog Stand
https://www.ms-sportsman.com/hunting/waterfowl-duck-hunting/diy-duck-blind-dog-stand/

Gray Wolves To Be Removed From Endangered Species List
https://www.npr.org/2020/10/29/929095979/gray-wolves-to-be-removed-from-endangered-species-list

Trump administration faces lawsuit over hunting expansion at nearly 150 wildlife refuges, hatcheries
https://thehill.com/policy/energy-environment/522881-trump-administration-faces-lawsuit-over-hunting-expansion-at-nearly
MDWFP to provide hunters with access to 46 freezer drop off locations to submit samples for testing of CWD for 2020-2021 Hunting Season.
http://www.mdwfp.com/wildlife-hunting/chronic-wasting-disease/
This fall could be a busy hunting season due to coronavirus.
https://fox40jackson.com/uncategorized/this-fall-could-be-a-busy-hunting-season-due-to-coronavirus-2/
2020-2021 White-tail Hunting Season Schedule:
https://www.mdwfp.com/media/253620/20-2020-2021tt-hunting-season-flyer-web.pdf
Recipe of the Week:
Venison Pot Roast
INGREDIENTS:
- 2 to 5 pound deer ham
- Peeled carrots, 1 inch long
- Small whole red or new potatoes
- White boiler onions
- Turnips
- Mushrooms
- Olive oil
- Pepper
- Kosher salt
- Lowry’s Salad Supreme
- 1 can of beef stock
- Whole garlic cloves
- Merlot or Madeira red wine
- Corn starch

METHOD:
1. Pot roast is the classic slow-cooker dish. And venison is the perfect meat for cooking this way. Deer, elk, moose, caribou, antelope and other lean game meat is superb in a slow cooker, too, because it becomes tender and stays juicy, enriching itself in its own unique, lean flavors.
2. A 2-to 5-pound venison roast is ideal, and be meticulous to trim off all game fat and sinew. Take your time doing this. A fine-blade fillet knife does it best.
3. Be sure the slow cooker has plenty of space for the roast and all vegetables. Squeezing meat into a too small pot is unwise.
4. The key to a good venison pot roast is to get a hefty char on the meat before it goes into the slow cooker. You can do it indoors, but the heat is so intense smoke likely will cause problems, including setting off home alarms.
5. So do it outside on high heat, in an iron skillet on a grill or side burner. Use a liberal amount of olive oil in the pan to prevent burning, but be sure there’s a nice hefty brown crust to the meat before turning to all six sides. Five to 10 minutes of searing per side is about right for a nice caramelized roast.
6. As it’s browning, season liberally with Kosher salt, fresh ground pepper and Lowry’s Salad Supreme.
7. Once the meat is nicely charred, bring it inside to the slow cooker. Add inch-long peeled carrots, small whole red or new potatoes, and whole white boiler onions. Cut turnips and mushrooms can be added too. Be sure to put carrots in first, as they slide tight to the bottom next to the roast, so there’s ample space for all vegetables.
8. Next add 1 can of beef stock, fill the can with a good Merlot or Madeira red wine, and add several whole cloves of crushed fresh garlic. Cover the slow cooker and set on medium-low heat. The meal will be ready in 8-10 hours.
9. When serving, remove the meat and vegetables and thicken the essence with corn starch so a flavorful rich gravy results. Served in large bowls with lots of gravy ladled overtop. Garnish with thyme, if desired. This is a classic Yankee venison pot roast meal, especially when served with a thick, homemade crusty bread.
10. Make plenty because leftovers are better every day it’s reheated.
